How long has it been since I started on this bear of a dining room?
Six weeks?
At least?
Well, it seems like everything is conspiring against me getting this darn thing finished.
One, $$$$$.
Two, life stuff.
Three, I lost my oomph because one and two weren't cooperating.
I mean, I have worked on some stuff.
Like, my dining room table:
And all those lovely little frames sitting on the shelves of the partially finished book shelf - and a few on the floor that are larger that you can't see.
And half of the chairs are done:
Kind of.
Four need second coats and two of them need to be started on.
HOWEVER...
That's what happens when three of your three cars all wind up in the repair shop in the SAME week. Lovely.
But, yesterday I had a wonderful surprise.
After discussing it back and forth for WEEKS with Scott (and driving him crazy with asking his opinion), I changed my mind about doing board and batten in the dining room. Although I always swoon at rooms done in neutrals, primarily white, I know that I need color. And I was so afraid that doing board and batten on three-quarters of the walls would be too much white for me - not to mention the fact that living on a dusty gravel road, I would be spending a huge amount of time cleaning, which is definitely NOT my favorite way to spend my time - unless, of course, I'm working a mad off. You know, cleaning as therapy? ;) So, I went back to doing wainscoting, as I originally planned.
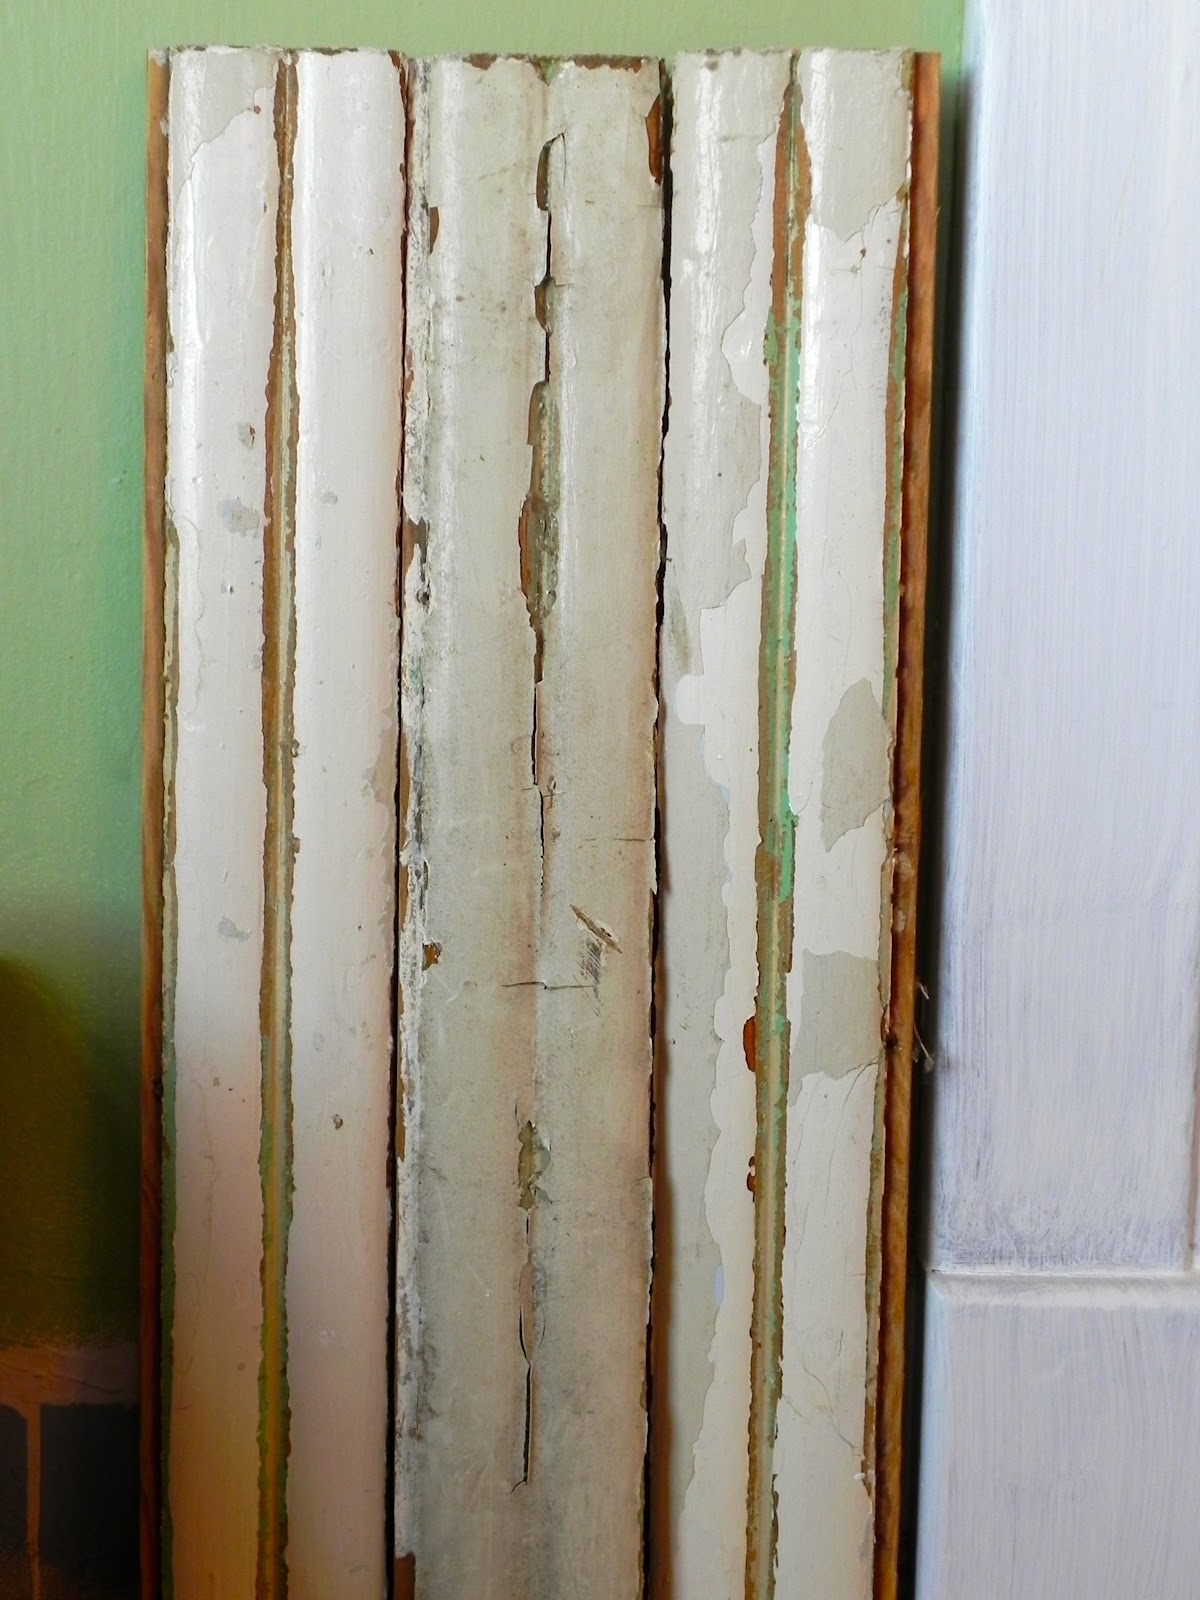
Scott and I went to Menard's to check out just how much the wainscoting, base trim, and chair rail will cost. Keep in mind, we just went in to look.
And guess what???
The wainscoting was HALF OFF. Yippee :)
So, we came home with 9 packs and the base trim.
Now granted, its not oak because they were sold out, but its like I told Scott, "I'm going to paint it. If I was going to stain it that would be one thing, but I'm not." (When inside I was thinking: "Just get the wainscoting now because if I don't get it at this price I'm NEVER going to get it." LOL) Although, he did get the oak base trim, since our other base trim that we bought is oak too.
It probably took us an hour and a half to put it in the cart, as we debated doing paneling sheets cut to size, using pre-primed MDF, or going with pine or oak. Scott was quick to point out that the MDF is what we have in the downstairs bathroom and it has not held up well to moisture, at all. And with the wear and tear of five kiddos (especially the BOYS - Wrestling in the house, anyone?) , he felt that wood was a better option.
Finally, he put it in the cart and all I wanted to do was get out of there before he decided he wanted to think on it for a little while. LOL I know my husband well and he really likes to THINK about stuff A LOT. So much, in fact, that sometimes he never gets around to buying it OR has done so much thinking and talking about doing something that by the time it comes time to do it, he's lost his motivation to do it. But, I suppose in that way we balance each other out because I'm a look before I leap kind of person. He really helps keep me in line and I help make sure he does stuff and doesn't over-think it, so it works for us. :)
And he got a new Dewalt drill, since ours took a poop on us when we were doing the book shelves AND a new air compressor, which he needs to run the nail gun because THAT took a poop on us, so we both were happy when we left the store.
And to think we just went to LOOK. Yep. That's how it works. I've just got to GET him there. LOL ;)
So, needless to say I'm super excited and ready to kick some booty today. But, like with all things that require Scott to help me, I'm going to have to wait until he has spare time to do it. But, if I get everything done where all I'm doing is waiting on him, I'll have good reason to give him the evil fish eye. HA HA HA
So today, I'm going to finish up the chairs and transform my wash stand with a bit o' paint.
Yes, I know I said that I wasn't going to touch it with paint, but I've decided that to fit the vision I have for the dining room, its gotta have some paint love. I really want to go out on a limb and paint it a color, but I think I'm going to play it safe with white and then give it some funky knobs courtesy of HL. Know what I mean?
And given that the kiddos only have two days of school this week thanks to Easter Break, I know if I'm going to do anything I better get 'er done today and tomorrow because nothing much ever gets accomplished with Rugrats one, two, three, four, and five at home - except cleaning up the trail of mess and chaos they leave in their wake.
And maybe, if I'm lucky...
Scott can do a little each night and that will make me EXTREMELY happy. And as everyone knows, if Momma's happy, EVERYONE is happy. Right? Right. ;)
Welcome To Our Little Big House On The Prairie
Showing posts with label remodeling. Show all posts
Monday, April 2, 2012
Tuesday, March 13, 2012
Wainscoting Woes
It seems like with every project in this house that we attempt, there's always some kind of woe involved.
Yesterday, I got so super excited when Scott walked in the door at 4:30 p.m. (which is waaaaay early in the day for him to be home) with a caulk gun in his hand and asked, "Are you ready to get to work?"
He didn't have to ask twice, I was off the couch in a jiffy... House Hunters was ridiculous anyway. Who in their right mind would pay $500,000 for a 10 week time share??? (Obviously someone with A LOT more money than me!)
So, we got to work...
After getting the first piece of floor trim cut and in place, Scott wanted to check out how the wainscoting would work.
Well, that and with 5 children, the business, and the house, divorce is simply too much of a headache. Its just easier to meet in the middle somewhere. ;) (That's Laura humor right there. HA!)
So, I dragged him over to the computer and sat him down in the chair and showed him this...
And that wall color is the almost exact color of our dining room, so that was a GREAT one to show him.
So, that's what we've decided on doing: Board and Batten
And I think, will look much better especially with the wood work beside the stairs.
Unfortunately, doing that means I have to wait. You know, for Scott to do some jobs and start getting some money rolling in. Its been a loooooong winter around here. The temps have been so mild that we haven't sold a quarter as much firewood, as we normally do. And with only three pushable snows, we haven't had any income from snow removals either. The only thing that has kept us going this summer is selling hay. It has NOT been a fun winter! And then there's those pesky bills that have to be paid... Business loans and a house payment and telephone and cell phone and electricity and cable... Did I mention its been a looooong winter? So wait, I must. He says two weeks at the most, since he already has work lined up. I can work with that.
In the meantime, I'm going to work on the furniture that's going in the dining room. Its time to break some paint out. And with the lovely 70 degree temperatures forecasted for the next week, I can really get the ball rolling.
Goal: Have all the furniture completed, so that by the time we get the board and batten up and painted, I can just move everything straight in. And then, it will be D-O-N-E. Finally.
And then I can start on the living room.
Here's hoping y'all all have a fantastic day... And if you live in Iowa, open up those windows peeps! Its going to be gorgeous day, dah-ling.
"Woe is me!"
LOL!
Yesterday, I got so super excited when Scott walked in the door at 4:30 p.m. (which is waaaaay early in the day for him to be home) with a caulk gun in his hand and asked, "Are you ready to get to work?"
"YES!"
He didn't have to ask twice, I was off the couch in a jiffy... House Hunters was ridiculous anyway. Who in their right mind would pay $500,000 for a 10 week time share??? (Obviously someone with A LOT more money than me!)
So, we got to work...
Love the smell of fresh cut wood!
After getting the first piece of floor trim cut and in place, Scott wanted to check out how the wainscoting would work.
Yeah. It didn't.
He didn't like the flat side.
And I didn't like the work involved with the bead board side.
Conundrum.
And why is it that we're still married after nearly 14 years?
C-O-M-P-R-O-M-I-S-E.
Well, that and with 5 children, the business, and the house, divorce is simply too much of a headache. Its just easier to meet in the middle somewhere. ;) (That's Laura humor right there. HA!)
So, I dragged him over to the computer and sat him down in the chair and showed him this...
![]() |
Sawdust and Embryos |
and this...
![]() |
Thrifty Decor Chick |
and this.
![]() |
Hooked on Houses |
And that wall color is the almost exact color of our dining room, so that was a GREAT one to show him.
So, that's what we've decided on doing: Board and Batten
Great compromise.
And I think, will look much better especially with the wood work beside the stairs.
![]() |
Notice anything different? Yep. I primered part of the stairwell. :) |
And for all you white lovers out there,
that's going to be a WHOLE lotta white!
Unfortunately, doing that means I have to wait. You know, for Scott to do some jobs and start getting some money rolling in. Its been a loooooong winter around here. The temps have been so mild that we haven't sold a quarter as much firewood, as we normally do. And with only three pushable snows, we haven't had any income from snow removals either. The only thing that has kept us going this summer is selling hay. It has NOT been a fun winter! And then there's those pesky bills that have to be paid... Business loans and a house payment and telephone and cell phone and electricity and cable... Did I mention its been a looooong winter? So wait, I must. He says two weeks at the most, since he already has work lined up. I can work with that.
Sooooooo...
In the meantime, I'm going to work on the furniture that's going in the dining room. Its time to break some paint out. And with the lovely 70 degree temperatures forecasted for the next week, I can really get the ball rolling.
Goal: Have all the furniture completed, so that by the time we get the board and batten up and painted, I can just move everything straight in. And then, it will be D-O-N-E. Finally.
Oh the joys of doing nothing on credit,
but only when we can afford it.
And then I can start on the living room.
YAY!
Here's hoping y'all all have a fantastic day... And if you live in Iowa, open up those windows peeps! Its going to be gorgeous day, dah-ling.
Friday, March 9, 2012
Progress: Wainscoting
This morning when I woke up, I wasn't feeling very motivated concerning the dining room. I spent all day yesterday playing catch up on laundry, cleaning the kitchen, and trying to get all the other rooms "manageable". This is what happens when you have five children and do nothing but paint. Today I just wanted to veg out. I dozed on and off on the couch until about noon while having an HGTV marathon. How I was able to do that for four hours and not get motivated is beyond me. Usually, that really gets my butt in gear. Finally, I decided to tackle the pile on wainscoting that's been laying in the dining room floor for 3 weeks or better.
It was a process to say the least - and my arms feel it.
Each piece had 2-4 nails. Large nails. That have been there for over a hundred years.
I had to beat them each out with a hammer.
Then pull them out the top side.
Sometimes they were so bent that I had to do this:
What? You don't wear dress socks when you're doing home improvement? ;) And, yes... I knocked myself in the chin a few times doing this, but they came out!
I've never really given you a good close up of the peeling paint I'm going to be dealing with...
and the lovely nail holes that those ginormous nails left behind.
Here's where your advice comes in. Again. I like asking everyone what they think even though I usually have the direction I'm going in my head. Hearing someone else's opinion sometimes reaffirms what I'm thinking and sometimes even changes my mind.
I have three directions I can go with this stuff.
1) The obvious: Strip all the paint and repaint them to match the trim. The right way. Will look new and more professional.
2) Flake off all the chipping paint and go for the really, really distressed look. Authentic. Adds texture and character. A lot less work. But will it be too much of the chippy look I love?
All of the darker beige paint like is on the center one and part of the right one will be gone, leaving the glossy white, bits of green and wood peeking out. (Obviously I haven't painted the trim yet. I'm going to do it all at once and depending on what I decide.) I haven't touched it, except to take the nails out. They need to be washed and all the flaking paint chipped off. Fun times! :P
3) Flip the boards over, go with the wider, flatter plank, and then paint them the same white as the trim will be. It achieves the same fresh, new look with less than half the work. It also gives it more of a farmhouse look. They'll have be sanded, but that's a heck of a lot better than stripping.
Keep in mind that there will be a wide base trim at the bottom and then it will be topped with a chair rail.
So, what do you think? 1, 2, or 3?
I'm pretty pleased with the progress I made today. All the wainscoting is neatly stacked in the corner...
And now I have a somewhat organized space to work in.
Not too bad for an afternoon's work. And the best part of all? Finding the treasures of history that someone over a hundred years ago left behind...
The name of the very first owner and builder of the house, plus the location to which the boards were being shipped. Way cool. I think I'll be setting two of these aside and doing something with them in the dining room. I love finding stuff like this in this house!
Next up:
Deciding what color to paint the risers of the stairs. I'm really leaning toward a lighter green than what is on the walls, but I'm questioning whether or not I should go with a more classic white. I'm afraid I'm getting caught up in the bright colors of spring fever and might regret it through the other months. Any thoughts on that?
Soooooooooo...
Please let me hear your thoughts on the wainscoting and the riser color. I always love to hear what you're thinking!!!
Have a great weekend, y'all!
Saturday, September 17, 2011
Marvelous Mantle Makeover
I've been on a roll!
I guess that's how it is, I get stuff done in fits and spurts.
So, you'll remember the mantle that I showed you a couple of days ago...
It was pretty much just sitting there with a bunch of Americana stuff propped up on it, for lack of anything else. Poor thing.
This mantle has traveled a long way to get to Iowa. It originally belonged to my Aunt Carrie, who lived to be almost 101 years old. It presided over the living room in her antebellum home in coastal North Carolina. Thankfully, when my mother heard that her family (distant cousins who we still shake our heads about) had made the decision to tear down that beautiful old house, she decided to go inside to see if there was anything left that could be salvaged. When she saw the mantle and realized its historical significance to our family, she asked my uncle if he would go in and help her get it out. It was sitting in my father's garage in Virginia when he died and I asked my mom if she cared if I took it home when I moved the rest of his things. So, here it has sat. Dusty and unloved, all lonely on the wall, where we hung it right after we moved in.
I've been threatening the hubs for a while now, that I was going to paint it. He was aghast that I would cover up its originally maroon paint, but I just couldn't stand it. Pretty much the only time of year it looked good was at Christmas. So today while he was gone, I made good on my threat. I painted it. The whole entire thing.
And you know what?
I think it looks great!
He, on the otherhand, just shook his head when he saw it. Oh well, I love it. I love it so much, I very possibly could spend hours looking at it. I might even want to marry it! And I cannot wait to decorate the entire office around it!
It looks a little bare right now, but I'm sure I will find the perfect pieces to go on it, over time. But for now, I'm happy. Very, very happy!
So here she is...
Now, to paint the trim... But first, I have GOT to finish the diva and the boys' room. I'm so easily distracted. ;)
Thursday, August 11, 2011
Dresser DIY
This is one of the middle son's dressers. I really need to come up with names to call them all on here because with four boys you can't say youngest and oldest. I'll think of something one of these days...
Anyhoo...
This is the dresser:
Since we're STILL waiting on the diva's room walls to cure, her room has become my workshop for the time being since I don't have to worry about dripping paint on the floors.
For now, I'll refer to this son as the wrestler. His favorite sport is wrestling, as to distinguish him from the football and basketball player. LOL
Anyway... The wrestler's dresser has a looooooong history. It was originally my ex-husband's dresser as a boy. It used to be a light yellow and when we first got married, I painted it white to match our bedroom furniture. Unlike today, I just slapped some paint on it, didn't agonize over it, and thought it looked great. When we divorced, somehow I ended up with it. It became my oldest daughter's for the last 17 years. Now that she's on her own, it has been handed down to the wrestler and it needs a paint job... BAD.
Since we're going for the whole Go-Hawk/Hawkeye theme in the boys' room, it is of course getting a good solid coat of black paint.
He thinks its looks like a girl's dresser, but I think that's just because its been his sister's forever and his brothers have chest of drawers instead. He won't think its girly when I get done with it!
One thing that I learned in my scavenging the internet for how to properly paint furniture is that it's better to use a roller. I found the PERFECT website that answered all of my questions. SCORE! You can find the same information here. Blue Cricket Design was a godsend! I also found the tip for putting a poly coat on the basketball player's chest of drawers there too. Saved the day!
So, I moseyed on down to my local True Value (its 45 minutes to the closest Lowe's and Menard's - Gotta love living in rural Iowa) and bought mini-rollers for use on wood. I bought the poly and foam brushes at the same time. And when she talks about buying the cheap foam/synthetic brushes at The Dollar Store... Yeah. Do it. The foam brushes are only good for one coat of poly and then you have to pitch them. Who knew?
This dresser met all of Blue Cricket Design's criteria.
1) Its a solid piece.
2) Its real wood.
and
3) Not a bit of veneer on it.
It even has dovetailing on the drawers:
Unfortunately, you can't really see it because I was a slap-happy 17 year old when I painted it the first time. GAH!
Her advice on using the rollers is spot on! I love it! When using a brush, 1) You get brush strokes in the paint, and 2) Its really easy to get too much paint on the brush and you end up putting on thicker coats. Using a roller allows you to get maximum coverage with minimal paint. You just roll the paint on until you get a solid, but light first coat. Plus, its a heck of a lot faster. (See... There's my lack of patience for time-consuming projects. :P)
So, I put on the 1st coat on early this afternoon and by early this evening, I was able to put on the 2nd coat. The coats of paint are so thin that they dry a lot faster than when I applied it with a brush. YAY! Now, I'm just waiting for the 2nd coat to dry before I do a quick touch up on any spots where it looks thin. Lord willing, I'll be able to apply the 1st coat of poly first thing in the morning, apply the 2nd coat of poly by tomorrow evening, and be done! YIPPY!
Here's what it looked like after the 1st coat:
The detailing underneath the top were a pain to get completely covered, but I think I finally got good coverage after the 2nd coat. I'm so excited to see what it looks like after I'm done!
I already bought the brushed nickel knobs a few weeks ago, so I'm ready as soon as the poly dries. Then it's on to the football player's chest of drawers. That one is going to be a new DIY nightmare with its chipped edges, but I love breathing new life into old stuff, not to mention how much money you save!
And that's why we do what we do, right? RIGHT!
Anyhoo...
This is the dresser:
Since we're STILL waiting on the diva's room walls to cure, her room has become my workshop for the time being since I don't have to worry about dripping paint on the floors.
For now, I'll refer to this son as the wrestler. His favorite sport is wrestling, as to distinguish him from the football and basketball player. LOL
Anyway... The wrestler's dresser has a looooooong history. It was originally my ex-husband's dresser as a boy. It used to be a light yellow and when we first got married, I painted it white to match our bedroom furniture. Unlike today, I just slapped some paint on it, didn't agonize over it, and thought it looked great. When we divorced, somehow I ended up with it. It became my oldest daughter's for the last 17 years. Now that she's on her own, it has been handed down to the wrestler and it needs a paint job... BAD.
Since we're going for the whole Go-Hawk/Hawkeye theme in the boys' room, it is of course getting a good solid coat of black paint.
BLACK and GOLD, baby!
He thinks its looks like a girl's dresser, but I think that's just because its been his sister's forever and his brothers have chest of drawers instead. He won't think its girly when I get done with it!
One thing that I learned in my scavenging the internet for how to properly paint furniture is that it's better to use a roller. I found the PERFECT website that answered all of my questions. SCORE! You can find the same information here. Blue Cricket Design was a godsend! I also found the tip for putting a poly coat on the basketball player's chest of drawers there too. Saved the day!
So, I moseyed on down to my local True Value (its 45 minutes to the closest Lowe's and Menard's - Gotta love living in rural Iowa) and bought mini-rollers for use on wood. I bought the poly and foam brushes at the same time. And when she talks about buying the cheap foam/synthetic brushes at The Dollar Store... Yeah. Do it. The foam brushes are only good for one coat of poly and then you have to pitch them. Who knew?
This dresser met all of Blue Cricket Design's criteria.
1) Its a solid piece.
2) Its real wood.
and
3) Not a bit of veneer on it.
It even has dovetailing on the drawers:
Unfortunately, you can't really see it because I was a slap-happy 17 year old when I painted it the first time. GAH!
Her advice on using the rollers is spot on! I love it! When using a brush, 1) You get brush strokes in the paint, and 2) Its really easy to get too much paint on the brush and you end up putting on thicker coats. Using a roller allows you to get maximum coverage with minimal paint. You just roll the paint on until you get a solid, but light first coat. Plus, its a heck of a lot faster. (See... There's my lack of patience for time-consuming projects. :P)
So, I put on the 1st coat on early this afternoon and by early this evening, I was able to put on the 2nd coat. The coats of paint are so thin that they dry a lot faster than when I applied it with a brush. YAY! Now, I'm just waiting for the 2nd coat to dry before I do a quick touch up on any spots where it looks thin. Lord willing, I'll be able to apply the 1st coat of poly first thing in the morning, apply the 2nd coat of poly by tomorrow evening, and be done! YIPPY!
Here's what it looked like after the 1st coat:
The detailing underneath the top were a pain to get completely covered, but I think I finally got good coverage after the 2nd coat. I'm so excited to see what it looks like after I'm done!
I already bought the brushed nickel knobs a few weeks ago, so I'm ready as soon as the poly dries. Then it's on to the football player's chest of drawers. That one is going to be a new DIY nightmare with its chipped edges, but I love breathing new life into old stuff, not to mention how much money you save!
And that's why we do what we do, right? RIGHT!
Frustrating 1st Ever Re-Do
Refurnishing can be especially nerve-wracking when you're new to being a DIY-er and don't possess a whole lot of patience. That's the first thing I've learned. Its like I see blogs all over the place where people seem to be turning out beautiful pieces left and right. They make it look very uncomplicated. Grrrrr!
So, you might remember the chest of drawers I refinished for my oldest son...
Well, let's just say that the final product wasn't what I imagined. It just needed something, but I wasn't sure what. I had used a satin paint and while I thought I didn't want it shiny, after it was done, it just didn't look right. Plus, the satin finish seemed to show every single flaw that I hadn't completely sanded out. It just looked... BLAH.
And since we're all about honesty here at Little Big House On The Prairie, I will admit that I attempted to use a clear spray gloss to use as a sealer, protectant, and to give it a little shine. Boy, did I screw it up! I don't know if heat got to the can or what, but it was glossy in spots and had a white film in others. In fact, I could run my hand along the top of the surface and it would come up coated in a white dust. What was THAT all about? It did NOT look like it did when I used the gloss to put a clear coat on a peg shelf I painted for the diva. What it did look like was polk-a-dotted. I really wanted to cry. I mean, REALLY. But more like a 3 year old temper tantrum cry. I was soooooo frustrated!!! I did NOT take a picture of that hot mess!
Too, I found out that using a paint brush on furniture looks terrible. Unless you want to see every little brush stroke, its a bad idea. I have to admit, after I used the spray gloss and it looked so terrible that I spent a good amount of timepouting like a baby reflecting about what I should/could have done differently. And I googled the heck out of painting techniques from some of my favorite bloggers. Then I spent some more time pouting like someone ate my last piece of Dove chocolate reflecting and just shut the door on it for a while. That really made my oldest son happy, let me tell you. Poor kid was living out of a laundry basket.
Yesterday, I finally got the guts to go up against the stupid chest of drawers again to try to salvage what I had already started. I REALLY didn't want to have to sand it (one thing I've discovered I hate with a passion) again, re-prime, and then repaint. Armed with a nifty foam brush and a can of Min-Wax Polyurethane, I tackled the dumb thing again. I let it dry overnight and hit it with a second coat this morning. Shutting the door on it, I put it out of my mind for another few of hours.
When I went back into the room, I could have sworn I heard the angels singing the Hallelujah Chorus! I actually got tears in my eyes. Yes, I was THAT frustrated by the whole entire thing. Beautiful... Shiny... Perfect. And the oldest son got to finally take it into his room, where I told him to go easy on it for the first few days.
So, here it is. FINALLY!
So, you might remember the chest of drawers I refinished for my oldest son...
Well, let's just say that the final product wasn't what I imagined. It just needed something, but I wasn't sure what. I had used a satin paint and while I thought I didn't want it shiny, after it was done, it just didn't look right. Plus, the satin finish seemed to show every single flaw that I hadn't completely sanded out. It just looked... BLAH.
And since we're all about honesty here at Little Big House On The Prairie, I will admit that I attempted to use a clear spray gloss to use as a sealer, protectant, and to give it a little shine. Boy, did I screw it up! I don't know if heat got to the can or what, but it was glossy in spots and had a white film in others. In fact, I could run my hand along the top of the surface and it would come up coated in a white dust. What was THAT all about? It did NOT look like it did when I used the gloss to put a clear coat on a peg shelf I painted for the diva. What it did look like was polk-a-dotted. I really wanted to cry. I mean, REALLY. But more like a 3 year old temper tantrum cry. I was soooooo frustrated!!! I did NOT take a picture of that hot mess!
Too, I found out that using a paint brush on furniture looks terrible. Unless you want to see every little brush stroke, its a bad idea. I have to admit, after I used the spray gloss and it looked so terrible that I spent a good amount of time
Yesterday, I finally got the guts to go up against the stupid chest of drawers again to try to salvage what I had already started. I REALLY didn't want to have to sand it (one thing I've discovered I hate with a passion) again, re-prime, and then repaint. Armed with a nifty foam brush and a can of Min-Wax Polyurethane, I tackled the dumb thing again. I let it dry overnight and hit it with a second coat this morning. Shutting the door on it, I put it out of my mind for another few of hours.
When I went back into the room, I could have sworn I heard the angels singing the Hallelujah Chorus! I actually got tears in my eyes. Yes, I was THAT frustrated by the whole entire thing. Beautiful... Shiny... Perfect. And the oldest son got to finally take it into his room, where I told him to go easy on it for the first few days.
So, here it is. FINALLY!
MUCH BETTER!
Tuesday, August 2, 2011
In The Meantime... The Boys' Room
While I'm waiting on the diva's room to cure, I decided to use it as a place to paint the boys' chest of drawers. Well, why not? All the carpet is ripped out. I'm going to either redo the hardwood floors or install carpet. Its the perfect spot! (And plus, I'm just too lazy to drag it down the stair and outside. Much easier to drag it across the hall!)
About a year ago, a good friend of mine gave me a chest of drawers that was sitting out in her garage. Honestly, I just thought I'd use it for a little while until we could afford to buy the boys matchy-matchy furniture for their room. Well, since I've been sucked into blog-land, I have realized that you can do just about anything with what you've already got.
Now, my boys are 100% All-American males. If its a sport, they play it or they want to play it. Their TV is constantly turned to the Big 10 Network or ESPN. My oldest plays basketball, while the other two are die-hard wrestlers and football players. They both were state qualifiers this year for the AAU Kids State Wrestling Championships in Des Moines and the youngest is the state runner-up in the 2nd grade 60 lb. weight class. Yep, we pretty much live and breath sports around here and I'm the typical mat mom.
Since we live in the great State of Iowa, my boys are University of Iowa Hawkeyes fans. By coincidence, our high school mascot is the Go-Hawk, which is very similar to the vintage Hawkeye. Our school colors are black and gold, as well.
About 2 years ago, I finally got their hideous blue/yellow flowered room painted. The top half of the wall is Hawkeye Gold and the bottom half is black. I know, makes your eyeballs pop out of your head, doesn't it? They, however, LOVE it. But given that their room is entirely Go-Hawk/Hawkeye themed, it works. It isn't what I would pick, but it definitely keeps them pumped up and focused on their game, whatever it may be. Throw in tons of medals and trophies for basketball and wrestling, and well... It a mecca for testosterone.
So anyway... A.D.D moment there...
I had this dresser. This ugly... hideous... disgusting dresser. I really wanted to throw it out. And then I started looking at all of these re-do's at some of my favorite blogs and I started thinking... This dresser just might have possibility.
Here it is BEFORE:
And then after some sanding, some primer, and some paint....
VIOLA!
I have to admit even I was surprised that it turned out that well. I was able to salvage the corroded knobs and pulls by sanding and spray painting them silver. All in all, I'm really pleased with how it turned out. Especially since it's the first time I've ever attempted to paint furniture.
And. . . Since this chest of drawers belongs to our resident pumpkin-pusher (basketball player), I added this for him:
Cut out a stencil on contact paper and then traced it with chalk.
Pulled off the contact paper to leave the traced stencil behind.
And then painted it free-hand.
Maybe next time I'll just leave the contact paper on and see how that works. My hand isn't steady enough for the edges.
I know I'm FAR from being an expert, but it sure does give me hope for the rest of the stuff I have sitting around the house. Plus, I'm practicing on the kids' stuff, so by the time I get to the furniture in my bedroom, I'll be a pro. ;)
Not too bad, eh?
Monday, August 1, 2011
Vision for the Diva
I think one of the most frustrating things is that I pour over all my favorite blogs and I see so much I want to do... wish I had... want... want today... want RIGHT NOW! I know that changing this home is a whole complete process, but patience has never been one of my strong traits. I want my home to be beautiful (insert stomp of a foot) NOW!
During the years when I had 5 under the age of 10, it was all I could do to get laundry done, much less think about decorating or anything else. I was plain just too tired. Now, my oldest is 17 and on her own and my youngest is almost 4, so I'm starting to look around and say, "How have you lived with no sense of style for this long?" Too, I think that for a while there, I didn't even know what my style was. When I think about all the money I spent trying out new decor... Country, Rustic, Americana (I have a bunch if anyone want to buy or trade LOL), but nothing ever seemed to be the right fit. Now, I'm old enough to know my own mind and how certain colors or objects make me feel. And when you're decorating your home, you want to feel good, right? I want colors and items that soothe me. Now that I know my style sense is centered around shabby chic with a coastal flair (You're always drawn to your roots, folks), I am so ready to get started. But first, I want to get the kids' rooms out of the way, so I am free to start scavenging and get focused on the rest of the house. Aren't they lucky?
I'm a firm believer that children's room should reflect the child's interest. While I would love for my daughter's and sons' rooms to be exactly how I want it, I know that they'll appreciate it, have pride in it, and hopefully, take care it, if it's something they like.
That brings us to the Diva's room. Her colors are bright and happy and because she loves flowers, full of them. When the Diva draws pictures, she uses every color in the spectrum. So, I wanted her room to reflect her love of color. Although all of her furniture will be white, the wall color and decor will pop with color. However, I will probably shabby up the furniture with a little distressing when I repaint it.
This is some of the furniture and all the decor I have bought so far:
Wicker Stand: $4.00 Garage Sale
Small Green Picture Frame: $4.00 1/2 off @ Hobby Lobby
Small Pink Picture Frame: $6.00 1/2 off @ Hobby Lobby
Hibiscus Frame: $5.00 @ Walmart
Small Hibiscus Pillows: $2.00 each @ Target
Flower Peg Shelf: $1.00 Garage Sale and painted by yours truly. :)
Love Picture: $25.00 1/2 off @ Hobby Lobby
Polka-Dot Memory Board: $8.00 1/2 off @ Hobby Lobby
Diva Pillow: $9.99 1/2 off @ Hobby Lobby
Striped Pillow: $19.99 @ T.J. Maxx
Surfboard Rug: $1.00 @ Target
Wicker Chair: $30.00 Garage Sale (Asking Price: $40.00)
Wicker Table: $30.00 Garage Sale (Asking Price: $40.00)
Wicker Breakfast Tray: $22.00 (Asking Price: $30.00)
Pink Shaggy Rug: $7.25 @ T.J. Maxx
BH&G Beverage Bucket: $5.00 on clearance @ Walmart
Pink Organizing Containers: $2.00 @ Hobby Lobby
Mirror: $5.00 Garage Sale
Retro Alarm Clock: $7.00 half off @ Hobby Lobby
Light Fixture: $0.50 Garage Sale (SCORE!)
Large Metal Flower: $6.00 half off @ Hobby Lobby
Small Metal Flowers: $5.00 each half off @ Hobby Lobby
Yellow Woven Flower: $6.80 on clearance @ Hobby Lobby
Don't you just love it when Hobby Lobby has their half off sales? I'm constantly watching their sales flyers because I know eventually something that I want will be half price. :)
During the years when I had 5 under the age of 10, it was all I could do to get laundry done, much less think about decorating or anything else. I was plain just too tired. Now, my oldest is 17 and on her own and my youngest is almost 4, so I'm starting to look around and say, "How have you lived with no sense of style for this long?" Too, I think that for a while there, I didn't even know what my style was. When I think about all the money I spent trying out new decor... Country, Rustic, Americana (I have a bunch if anyone want to buy or trade LOL), but nothing ever seemed to be the right fit. Now, I'm old enough to know my own mind and how certain colors or objects make me feel. And when you're decorating your home, you want to feel good, right? I want colors and items that soothe me. Now that I know my style sense is centered around shabby chic with a coastal flair (You're always drawn to your roots, folks), I am so ready to get started. But first, I want to get the kids' rooms out of the way, so I am free to start scavenging and get focused on the rest of the house. Aren't they lucky?
I'm a firm believer that children's room should reflect the child's interest. While I would love for my daughter's and sons' rooms to be exactly how I want it, I know that they'll appreciate it, have pride in it, and hopefully, take care it, if it's something they like.
That brings us to the Diva's room. Her colors are bright and happy and because she loves flowers, full of them. When the Diva draws pictures, she uses every color in the spectrum. So, I wanted her room to reflect her love of color. Although all of her furniture will be white, the wall color and decor will pop with color. However, I will probably shabby up the furniture with a little distressing when I repaint it.
For The Diva:
This is some of the furniture and all the decor I have bought so far:
Wicker Stand: $4.00 Garage Sale
Small Green Picture Frame: $4.00 1/2 off @ Hobby Lobby
Small Pink Picture Frame: $6.00 1/2 off @ Hobby Lobby
Hibiscus Frame: $5.00 @ Walmart
Small Hibiscus Pillows: $2.00 each @ Target
Flower Peg Shelf: $1.00 Garage Sale and painted by yours truly. :)
Love Picture: $25.00 1/2 off @ Hobby Lobby
Polka-Dot Memory Board: $8.00 1/2 off @ Hobby Lobby
Diva Pillow: $9.99 1/2 off @ Hobby Lobby
Striped Pillow: $19.99 @ T.J. Maxx
Surfboard Rug: $1.00 @ Target
Wicker Chair: $30.00 Garage Sale (Asking Price: $40.00)
Wicker Table: $30.00 Garage Sale (Asking Price: $40.00)
Wicker Breakfast Tray: $22.00 (Asking Price: $30.00)
Pink Shaggy Rug: $7.25 @ T.J. Maxx
BH&G Beverage Bucket: $5.00 on clearance @ Walmart
Pink Organizing Containers: $2.00 @ Hobby Lobby
Mirror: $5.00 Garage Sale
Retro Alarm Clock: $7.00 half off @ Hobby Lobby
Light Fixture: $0.50 Garage Sale (SCORE!)
Large Metal Flower: $6.00 half off @ Hobby Lobby
Small Metal Flowers: $5.00 each half off @ Hobby Lobby
Yellow Woven Flower: $6.80 on clearance @ Hobby Lobby
Don't you just love it when Hobby Lobby has their half off sales? I'm constantly watching their sales flyers because I know eventually something that I want will be half price. :)
I also scored the following on the
Large Mirror. . .
Chest of Drawers. . .
Night Stand. . .
And a lamp that they threw in for free
that I let the Diva paint to her heart's content.
And then the same people just happened to have this Lane Cedar Chest for sale for an additional $125.00 SUH-WEET!
At first when I saw the knob was missing, I was like,
"Great. More knobs to buy."
But nope. It was inside. YAY!
However, that pink cover has GOT to GO! Can we say 80's??? So, I'm going to replace it with this:
And since we already have two twin beds with cottage style headboards, all of it complements perfectly. I always get so excited when I find deals like that!
{ Well, I was going to show you some awesome pink polka-dotted fabric I got from Hobby Lobby for $4.00, but the server keeps rejecting the picture. Guess you'll just have to use your imagination.}
And since we already have two twin beds with cottage style headboards, all of it complements perfectly. I always get so excited when I find deals like that!
I bought two of these comforter sets from Kohl's for $119.00 and paid no shipping.
You like? I do too! You can find it at www.kohls.com in Girl's Bedding. Its currently at our local embroidery shop having the Diva's name embroidered on the shams.
Her room will be painted "Talkative Turquoise" and "Green Clover" by Dutch Boy Crayola Paint. You can see the colors here. With the trim painted white - yes, I'm painting that glorious original trim - the colors are really going to pop. What is your opinion on painting original trim? Would you do it? Why or why not?
Needless to say, I have all this cool stuff and no where to put it. Its currently in residence in my living room, which is driving me nuts. Hopefully, the skim-coat will be dry soon and we can get her room finished so we can move on to the boys'. The sooner I get their rooms done, the sooner I can move onto the rest of the house! :)
Subscribe to:
Posts (Atom)