Welcome To Our Little Big House On The Prairie


Showing posts with label painting furniture. Show all posts

Tuesday, April 17, 2012

C is for...

C is for CHANDY.  As in a chandelier.  Like in a thrifted $20.00 chandelier.  That was ugly.  That is now bee-yoo-ti-ful.


Before in its black wrought iron blah-ness:


Makes me think of hunting lodges and sightless glass-eyed taxidermied deer staring at me.  From all angles.  Or maybe that's just me.


Here's a peek.  

Its got swag.


And swag covers...  That I made myself.  With burlap.  And straight pins.  And Fabric Fusion.  Cuz this girl don't sew.


Course I had to wait hours for it to dry.  

I oughta learn to sew.

CC stands for China Cabinet.  That got torn apart.  As in extreme makeover.  Inside and out.

Wanna peek?

Go ahead...  I ain't gonna stop ya.  ;)


C is for CIGARETTE SMOKE.  As in FOUR BUCKETS of soap and water to clean off YEARS of nasty smoke residue.  That turned said bucket of water into brown muddy run-off.  I don't care about the smoking, but at least be CLEAN.  Seriously.  EW


C is for CARING HUSBANDS who do all that techy work for you - like taking off  backs, removing glass, and unscrewing door hinges and knobs - so all ya gotta do is PAINT.


C is also for CURVACEOUSNESS.  As in the curvaceous detailing.  Its a word.  Because the little red underline thingy didn't pop up.  Thingy however, is NOT a word.


C is also for CRAP.  As in, "Crap!  The china cabinet ate all my Annie Sloan Chalk Paint!"   Every.  Last.  Drop.  Knew I should have ordered more than one quart.  :P


C could also be for CRAZY AWESOME, which is how this baby is going to look once she's been sanded and waxed and put together again.

And finally, C is for CIAO - as in see ya later.  With the reveal.  Soon.  I promise.


Sunday, April 15, 2012

ASCP Fun... And a coffee table makeover.

For the rockin' peeps that follow moi on Facebook, you know that on Friday I posted this picture:


I received my very first delivery of ASCP product.  I can't tell you how long I have hemmed and hawed over spending that kind of money, but finally I just did it.  And I am sooooo glad I did.  :)

At first, I was super scared to use it.  I stared at it for a couple of hours and googled the heck out of ASCP technique.  I should have just bought Mrs. Sloan's book.  Its one thing to waste cheap paint on a screw up.  Its a completely different thing to mess up with really expensive paint.  Know what I'm sayin'?

So, after spending lots of time on the wide world web, I decided I better get to it, so I painted a chandy.  I'm saving that reveal for later.  Gotta hang it.  ;)  (I'm such a TEASE.)

Its beautiful, beautiful paint even if it does make a GINORMOUS mess (Think: You need to wear a mask) when you sand it, but my, oh my...  It feels like silk.  Butter.  Cashmere.  Oh, so very soft.  And I also noticed my hands weren't as dried out as they are when I use latex paint.  I'm not sure I can ever go back to homemade, unless I simply can't afford the ASCP.

Next, I decided to tackle a coffee table that I've had for about 6 months.

Back in October, I found this barn wood coffee table on Craigslist. Initially, the lady had it listed for thirty dollars, but I kept watch and after a couple of weeks, she dropped it to $15.00.  SOLD!


Now granted, when I saw it online I thought the bottom was black. Nope.  Purple.  Maroon.  Whatever.  It was fugly.  Nothing that paint couldn't fix though.  The barn wood on top was fantastic and the legs, not matching, look like either old table legs or porch posts.  I love that they don't match, although I would have put the matching ones on the diagonal from each other, instead of on the same side.  Scott and I tried to take it apart.  Yeah.  I can say this for the person who made it:  Bomb proof.


I stripped and sanded away at her for a couple of days and finally gave up trying to get that hideous maroon off.  It had pretty much dyed the wood and was in all the crevices.  So, I just left her in the living room and promised she would be the first thing I tackled if I ever bought ASCP.


At Christmas.
So she was.


Anyway...  Blah, blah, blah.


Here she is after.


The top is done with Old White - which for people that have never ordered it, is a little more Cream than I would have liked.  I should have ordered the Pure White.  The bottom is actually Calypso Sky and is an acrylic, that I mixed with the Old White.  It worked beautifully.  All the hype about ASCP lasting forever is true.  I painted the entire base, plus the underneath of the base that you can't see, using about a cup.  No kidding.

No staging for pictures.
The dining room is in progress and all my dining room crap is in the living room  :(

Unfortunately, my little stinker ran his trucks over it (be sure to let the wax cure for twenty four hours MINIMUM), so it scratched up the top a little.  GAH!  I guess it being tucked in the corner of the dining room wasn't a hint.  Oh well, it does make a good road, I guess.  Even if I'm going to have to re-do it.  ARGH.


I pretty much did no distressing on the legs and waxed it (as directed by my beautiful bloggy friends on Facebook) with the light wax first, then the dark, then again with the light.  Worked like a charm.  And that dark wax is going to last me FOR-EVAH.


See, even Lucy Kitty likes it.  :)

Not too shabby for my first use of it.  And with a fifteen dolla (HOLLA!) piece of furniture, it was a great piece to try it out on.  Now, for the big boy...  The china cabinet.  Fingers y'all crossed y'all!


XOXO,


Wednesday, April 11, 2012

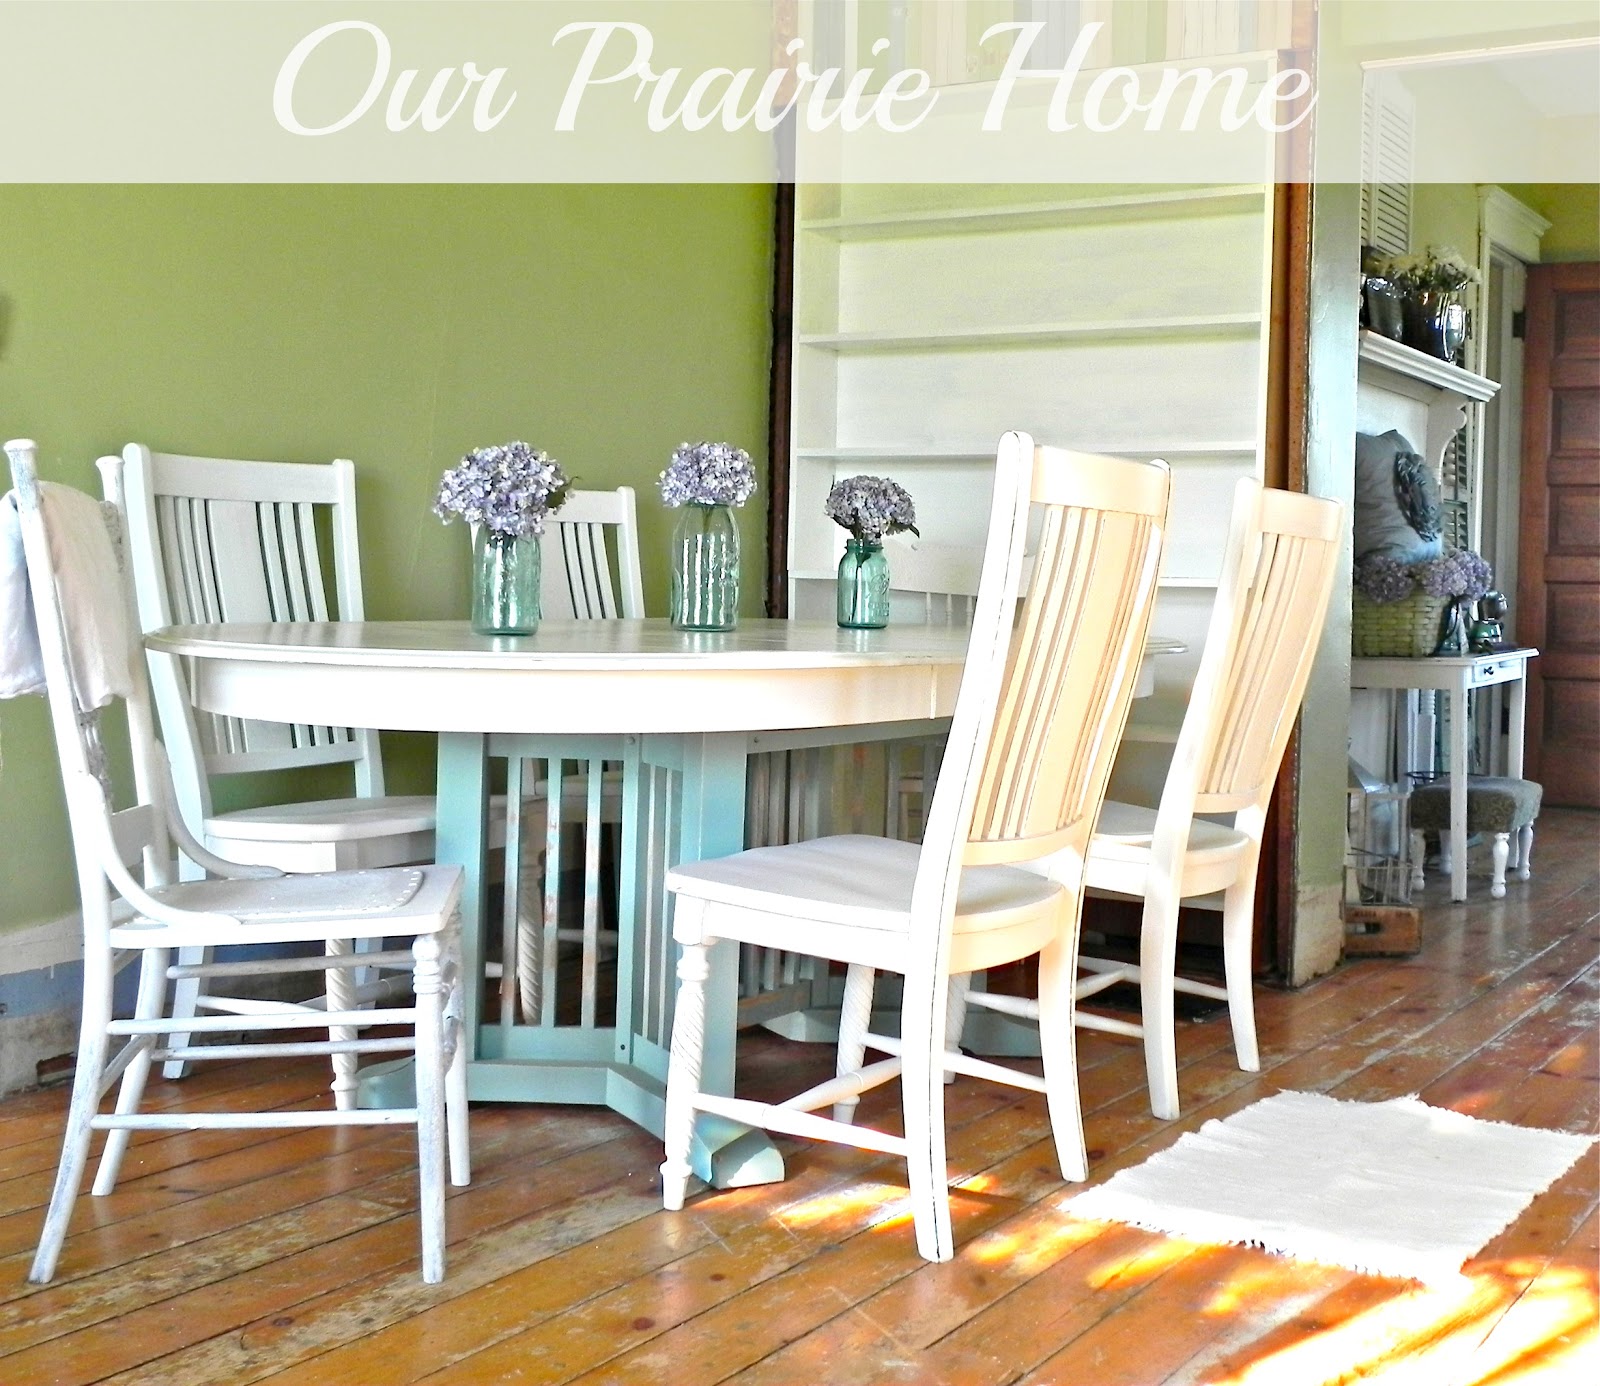
Dining Room Table: Reveal


I apologize in advance for those of you who voted for the book shelves to be done first, instead of the dining room table.  Unfortunately, the book shelves require Scott's know-how and the dining room table did not.  I'm still waiting on the trim for the book shelves.  I really should learn how to operate power tools.  LOL

Anyhoo...

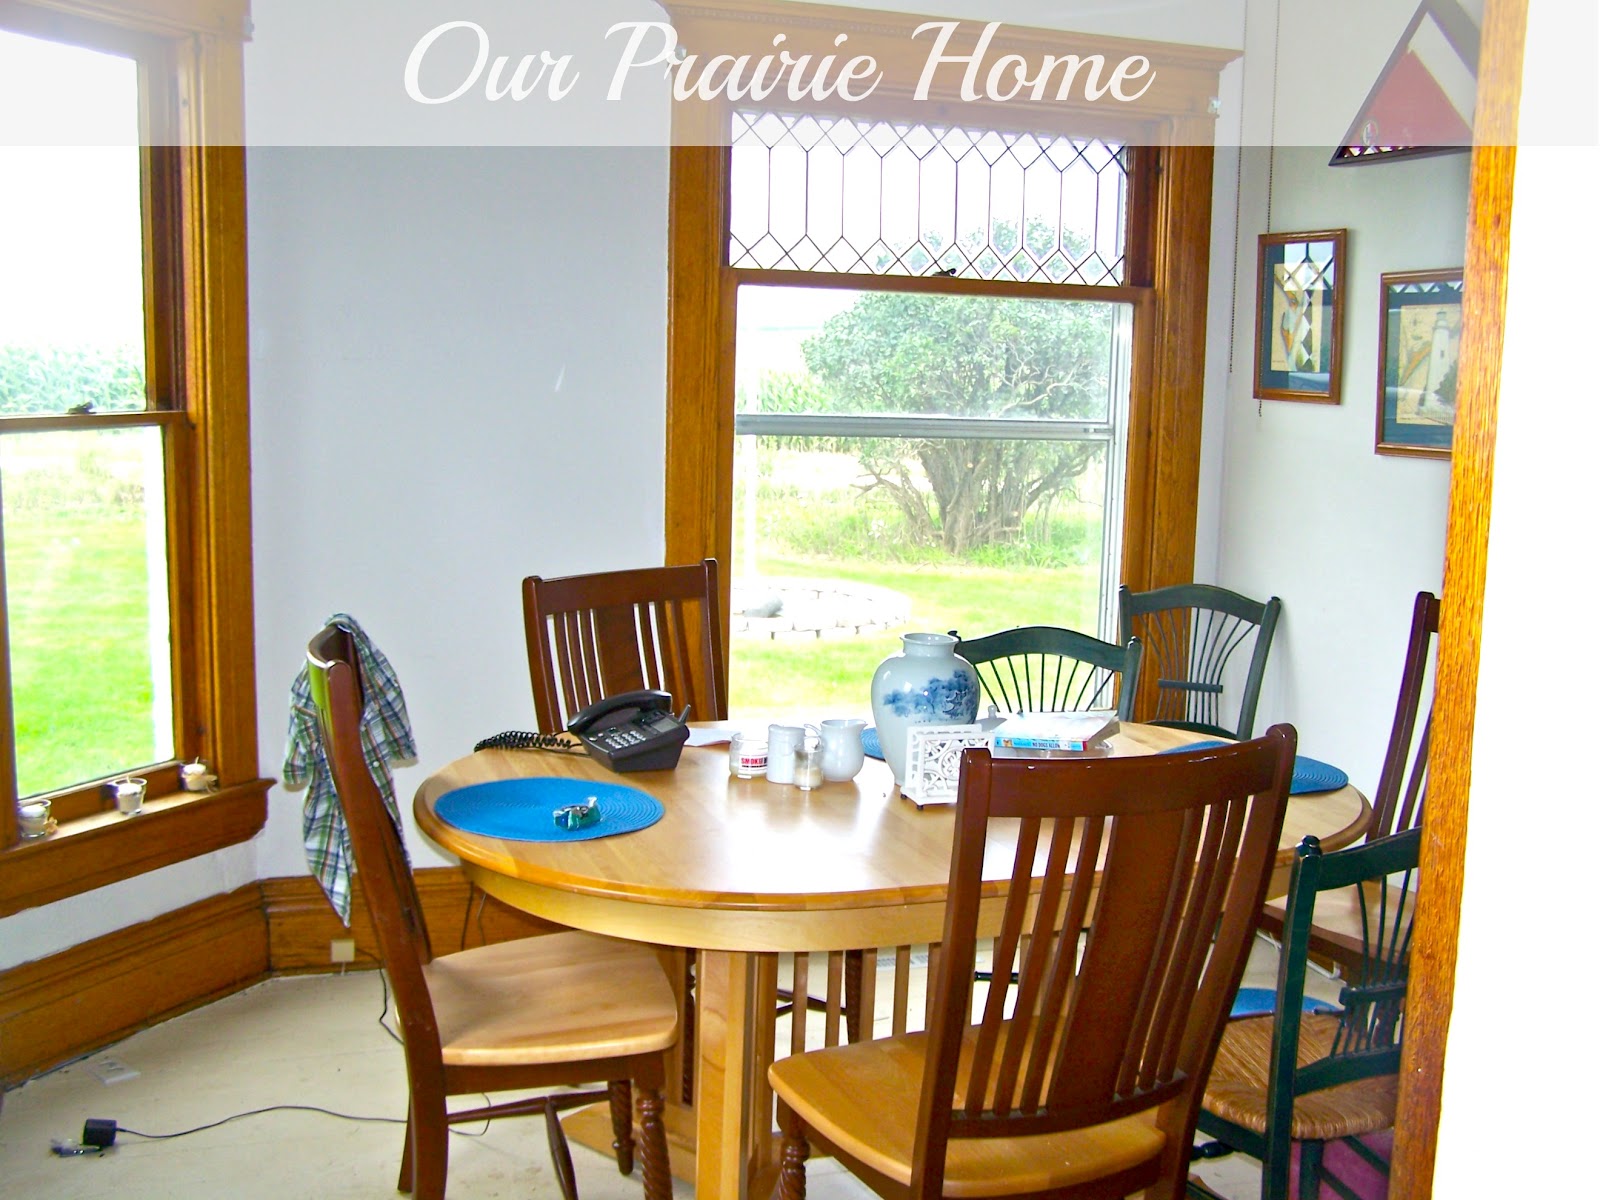
The dining room table was my Mom and Dad's.  After their divorce, my Dad got the dining room table and when he died, I got it.  My Dad was all about wood, like most typical men.  Stained wood furnishings were the rule of thumb in his house.  Needless to say, I inherited quite a bit of paintable furniture.  He's probably rolling over in his grave, somewhere in Delaware Bay.  Sorry Daddy, but the wood has got to go.  I know you would still love me anyway. :D

Okay, so on that morbid note, here's the before pic taken shortly after we moved into our house.

I still can't believe that this was the office!

After five years of basically using it from everything from meals to homework to school projects to crafts, it was looking mighty rough.  When I questioned my mom as to why in the world they bought a maple table because its such a soft wood, she said, "Because it was on sale."  Oooookay then.

So, I wiped her down and did some light sanding for prep:


And the same with the chairs:


I had to sand a little heavier on the edges of the tops and sides because they were knicked and dinged to death.

Using my trusty chalk paint recipe, I painted the top with "Cotton Balls" by Benjamin Moore and the bottom, my favorite color ever...  "Covington Blue" from the Benjamin Moore Historical Series.  Its a blue without being a blah blue.  Depending on the light, it can take on almost an aqua-y feel without being aqua.  Its a lovely color.


 I debated on going all white for quite some time, but as I usually do, I went off of what I am drawn to in my home decor magazines.  And its always the tables that the bases are painted blue.  Every.  Time.


And you know me with my "too much white" thing going on.  And of course I had to "make it look old".  ;)


And I can tell you its no fun trying to reveal a piece of furniture and get a good picture of it when the room is still in demo stage.  LOL


 So, just try to ignore the half painted book shelf with its missing trim and the destroyed wood floors that we've finally decided just to paint.  Obviously having someone come in and re-do them just ain't going to work.  The pine is just too soft to withstand our foot traffic and I'm not going to throw another $900.00 out the window for the floors in the office and the dining room again, only to have them look like they do now... Again.  Contractor horror stories, anyone?


I am still amazed at how much going lighter has made a difference in the atmosphere of our home.  Its so much more cheerful and relaxing.  

My goal is to get a bench to go on the wall side of the table, so it can be pushed back against the wall when not in use.  For now, painting the two oak pressback chairs to match works.  Plus, a bench will seat three of my rugrats, making room for everyone at the table.

I can't wait to get the wainscoting done, so I can hang that gorgeous mirror on the wall above the table.  Scott?  Are you reading this???  ;)


Next...

My Dad's rocking chair or the china hutch.  I haven't decided yet.  Check out my facebook page for new uploads of the china hutch.  We picked her up last night.  :D

XO,

Linking up to:

Tuesday, April 3, 2012

Reveal: Washstand

Back in November, Scott bought me this beautiful washstand from our local thrift for $125.00.  You can read about that HERE.  Although I swore I would never paint her, I did.  I gave in.  I am on a mission to purge the house of any its dark depressing-ness.  And she needed a paint job.


Yesterday, I decided to stop procrastinating and just do it already.  I fixed a few spots where her top was chipped on the edges with some wood filler and lightly sanded her down before I got to work with some homemade chalk paint...


I hemmed and hawed forever over whether to do a color or stick with white.  I usually decide to play it safe with white or some other neutral and then drool over blogger peeps that throw caution to wind and go with bright, vivid color.  Take Amy for example, from The Salvage Collection.  She's always doing awesome furniture makeovers with vibrant color, like this:

Droolin' on the "kuh-nobs".
(Ya gotta read Amy to get that.)

So, I decided to go out on a limb.  

And jump.

There's one thing about it, you're either going to love it or hate it.  I love it.  And the knobs...  Yeah.  I {heart} Hobby Lobby.  And better yet, 50% off.  I am so glad I drove 45 minutes into W'loo yesterday on a whim.  The knobs make it.


And the detailing that I love totally "pops" now.


I'm actually surprised how much I like it.  


Adore it, actually.


Super bright.  Super cheerful.

And get this...

This morning as I was groggily sitting up in bed trying to shake off the last dregs of sleep, I looked over at the rocking chair that I bought off Craigslist last summer for $30.00.  Amazingly enought, I think it was built by Square Brand too.  The detailing is almost exact.


What are the odds of that?

Pretty slim, I betcha. 


Now, some of you are probably ranting at your computer right now because I painted an antique.  You probably liked the dark heaviness of the original:


But I think she's gorgeous.


And totally me.

And when you throw in some perky spring goodness...


Does it get any better?

I don't think so.

What about you?

XO,

Thursday, January 19, 2012

Putting The Office Together: Original Desk Makeover

One of the biggest things I second guessed myself about was how to fill up the space in front of my mantle.  I poured over magazines and the internet trying to get a good idea of something that would do the trick.  Enter my old desk.

The desk I used to use for my computer was a small, dainty lady's writing table that my father stripped and refinished.  My Dad had a thing for dark stains.  All the furniture I inherited has it.  And that means a lot of work changing it into something I can live with.


This was probably one of the easiest furniture makeovers I've ever done.  Literally one and a half hours start to finish.  I sanded it a little, just because it had a heavy coat of varnish.  Daddy loved his varnish too.  LOL!  I applied two coats of homemade chalk paint, then sanded lightly with a sanding block to smooth out the finish.  Next I distressed (that caused the blister on my thumb from rubbing LOL), waxed, and added a knob from one I had bought for this purpose a few months ago.  Done.


Instant gratification.


And instead of making the interior permanent by decoupaging a piece of scrap book paper to the inside of the drawer, I just used tape on the backside, so I can change it, if/when I get tired of it.


And I just love her legs...


Although I need to buy a darker wax and apply it, so those details pop.


It never ceases to amaze me what a little paint and time can do.  :)


What a great addition to the mantle.  Love it and so easy to do!  Aren't those the best projects?  :D


Monday, October 24, 2011

Furniture Painting: Just Do It

On Sunday's post, I told you about a little paint job I did on a turn of the century chair that I picked up at the local thrift a couple of weeks ago for $15.00.  Unfortunately, I don't have any in between pictures because I was in such a rush to get it completed.  I literally started like 3 hours before our family photo shoot.  And you know what?  I am so glad I did!

Usually, I so over think things.  I'm like a teenage girl with a crush...  "Do you think he likes me?"  "Did he just look at me?"  "He said blah-blah-blah."  "What do you think that means?"  Seriously, I analyze every little thing I do and worry I'm doing the wrong thing or going to do the wrong thing or pick the wrong color, so there are several pieces around here that I haven't touched for that very reason.  I might come across very "Uh....  Like whatev-ah!  Let it all hang out type" on my posts, but when it comes to doing something in the house or making a decision to do something in the house, I paralyze myself with doubt and it either doesn't get done or takes forever to get done..  Does anyone else do this???

So, it was the morning of the pictures and a few days earlier I had picked up a sample of BH&G "Peacock Blue" paint from Wally World on a whim because it was the exact same shade we were using for our "pop" color.  Then once I got home, I started overanalyzing it...

"Do I really want to paint this chair this color?" 

"What if it looks horrible?"

"Am I really going to want to have to re-sand and 
repaint it just for a few pictures?"

"What if it just looks tacky?"

"What if it ruins the whole feel of the chair?"

"What if I just plain hate it and 
we won't have a prop for the pictures?"

"I should just leave it like it is and use it."

I tell you what, if I took inner dialogue to the next level, I might really be dealing with some mental illness issues.  I literally have done nothing with a few pieces I've picked up because I don't want to ruin them - even though logically I know that anything would be better than how they are now.  Are you paralyzed with indecision when it comes to a few of your pieces too?


Well, Saturday morning, I had a staring contest with one of the chairs.  I mean, it would have been a staring contest if the chair had eyes...  Nevermind.  Anyway, I thought and thought and thought and did a few things around the house, only to come back and look at it some more.  Indecision, indecision, indecision.  Make up your mind already!

So, about three hours before the shoot, I googled dry brushing techniques and grabbed the sander.  I wiped it down, sanded it lightly all over and not very well,  and then I just went to town.  Snagged the blue paint and a brush.  Didn't think about it.  Didn't analyze every single stroke.  Just did it.  That's going to be my new motto...

Furniture Painting:  Just do it.

And because I didn't like how the dry brushing was looking on the piece, I started using a technique similar to glazing, but I didn't slop it on.  I still went light on the application, but then I went right behind it and rubbed the paint into the wood to "stain" it.  There was no rhyme or reason.   No thought.  Heavier in some areas, lighter in others.  And because the feeling of our pictures was going to be a little funky, I threw the thought of a seat cushion out the window and left the pressboard bottom with the huge nail heads.  And painted that too.  And then sanded the rust off tops of the nails, so they were silver.  Then I lightly sanded it all over with a sanding sponge before calling it good.

To save you from scrolling back up, here's before:


And the after of one of them...


I am totally loving it!  And plan to do the other one the exact same way.  Who would have ever thought???

Another lesson learned:  Don't think about it so hard.  Trust your instinct and just do it.  You might just be surprised.


Now just to figure out where its going to go!

Have a great day, y'all!

Take care,