Welcome To Our Little Big House On The Prairie


Showing posts with label before and after. Show all posts

Sunday, April 15, 2012

ASCP Fun... And a coffee table makeover.

For the rockin' peeps that follow moi on Facebook, you know that on Friday I posted this picture:


I received my very first delivery of ASCP product.  I can't tell you how long I have hemmed and hawed over spending that kind of money, but finally I just did it.  And I am sooooo glad I did.  :)

At first, I was super scared to use it.  I stared at it for a couple of hours and googled the heck out of ASCP technique.  I should have just bought Mrs. Sloan's book.  Its one thing to waste cheap paint on a screw up.  Its a completely different thing to mess up with really expensive paint.  Know what I'm sayin'?

So, after spending lots of time on the wide world web, I decided I better get to it, so I painted a chandy.  I'm saving that reveal for later.  Gotta hang it.  ;)  (I'm such a TEASE.)

Its beautiful, beautiful paint even if it does make a GINORMOUS mess (Think: You need to wear a mask) when you sand it, but my, oh my...  It feels like silk.  Butter.  Cashmere.  Oh, so very soft.  And I also noticed my hands weren't as dried out as they are when I use latex paint.  I'm not sure I can ever go back to homemade, unless I simply can't afford the ASCP.

Next, I decided to tackle a coffee table that I've had for about 6 months.

Back in October, I found this barn wood coffee table on Craigslist. Initially, the lady had it listed for thirty dollars, but I kept watch and after a couple of weeks, she dropped it to $15.00.  SOLD!


Now granted, when I saw it online I thought the bottom was black. Nope.  Purple.  Maroon.  Whatever.  It was fugly.  Nothing that paint couldn't fix though.  The barn wood on top was fantastic and the legs, not matching, look like either old table legs or porch posts.  I love that they don't match, although I would have put the matching ones on the diagonal from each other, instead of on the same side.  Scott and I tried to take it apart.  Yeah.  I can say this for the person who made it:  Bomb proof.


I stripped and sanded away at her for a couple of days and finally gave up trying to get that hideous maroon off.  It had pretty much dyed the wood and was in all the crevices.  So, I just left her in the living room and promised she would be the first thing I tackled if I ever bought ASCP.


At Christmas.
So she was.


Anyway...  Blah, blah, blah.


Here she is after.


The top is done with Old White - which for people that have never ordered it, is a little more Cream than I would have liked.  I should have ordered the Pure White.  The bottom is actually Calypso Sky and is an acrylic, that I mixed with the Old White.  It worked beautifully.  All the hype about ASCP lasting forever is true.  I painted the entire base, plus the underneath of the base that you can't see, using about a cup.  No kidding.

No staging for pictures.
The dining room is in progress and all my dining room crap is in the living room  :(

Unfortunately, my little stinker ran his trucks over it (be sure to let the wax cure for twenty four hours MINIMUM), so it scratched up the top a little.  GAH!  I guess it being tucked in the corner of the dining room wasn't a hint.  Oh well, it does make a good road, I guess.  Even if I'm going to have to re-do it.  ARGH.


I pretty much did no distressing on the legs and waxed it (as directed by my beautiful bloggy friends on Facebook) with the light wax first, then the dark, then again with the light.  Worked like a charm.  And that dark wax is going to last me FOR-EVAH.


See, even Lucy Kitty likes it.  :)

Not too shabby for my first use of it.  And with a fifteen dolla (HOLLA!) piece of furniture, it was a great piece to try it out on.  Now, for the big boy...  The china cabinet.  Fingers y'all crossed y'all!


XOXO,


Wednesday, April 11, 2012

Dining Room Table: Reveal


I apologize in advance for those of you who voted for the book shelves to be done first, instead of the dining room table.  Unfortunately, the book shelves require Scott's know-how and the dining room table did not.  I'm still waiting on the trim for the book shelves.  I really should learn how to operate power tools.  LOL

Anyhoo...

The dining room table was my Mom and Dad's.  After their divorce, my Dad got the dining room table and when he died, I got it.  My Dad was all about wood, like most typical men.  Stained wood furnishings were the rule of thumb in his house.  Needless to say, I inherited quite a bit of paintable furniture.  He's probably rolling over in his grave, somewhere in Delaware Bay.  Sorry Daddy, but the wood has got to go.  I know you would still love me anyway. :D

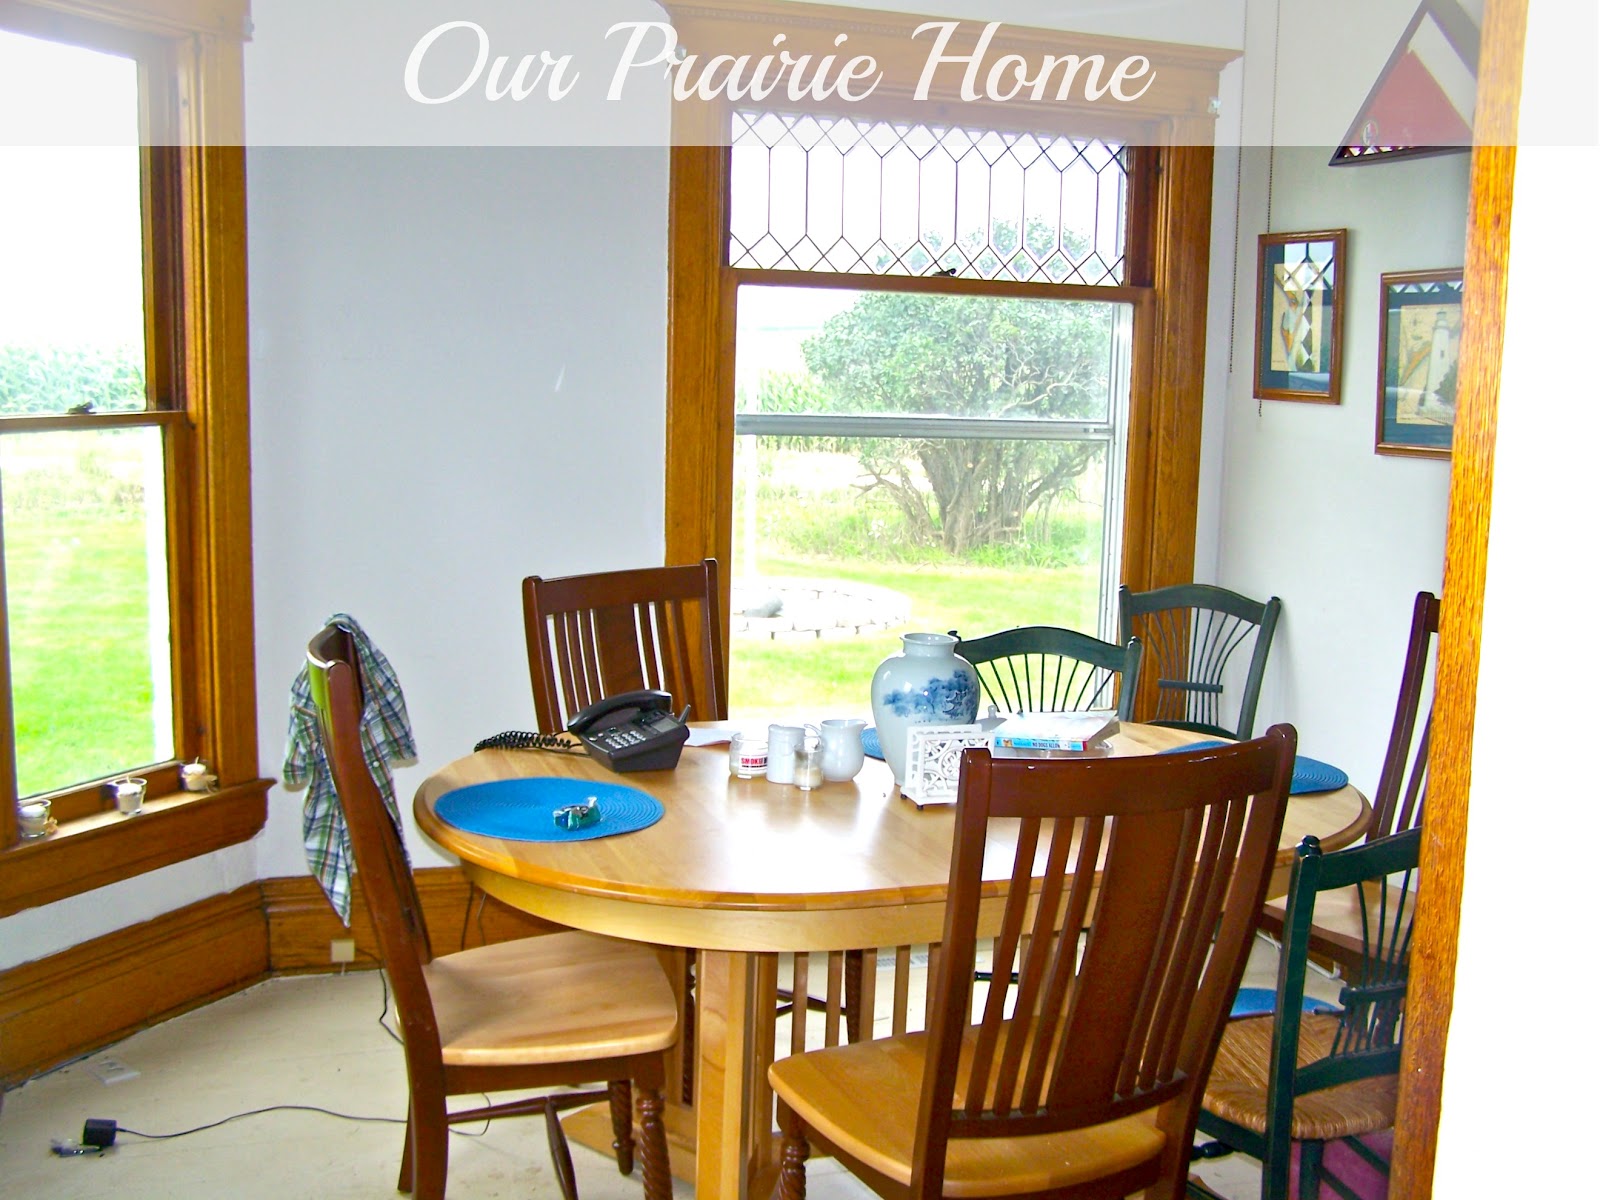
Okay, so on that morbid note, here's the before pic taken shortly after we moved into our house.

I still can't believe that this was the office!

After five years of basically using it from everything from meals to homework to school projects to crafts, it was looking mighty rough.  When I questioned my mom as to why in the world they bought a maple table because its such a soft wood, she said, "Because it was on sale."  Oooookay then.

So, I wiped her down and did some light sanding for prep:


And the same with the chairs:


I had to sand a little heavier on the edges of the tops and sides because they were knicked and dinged to death.

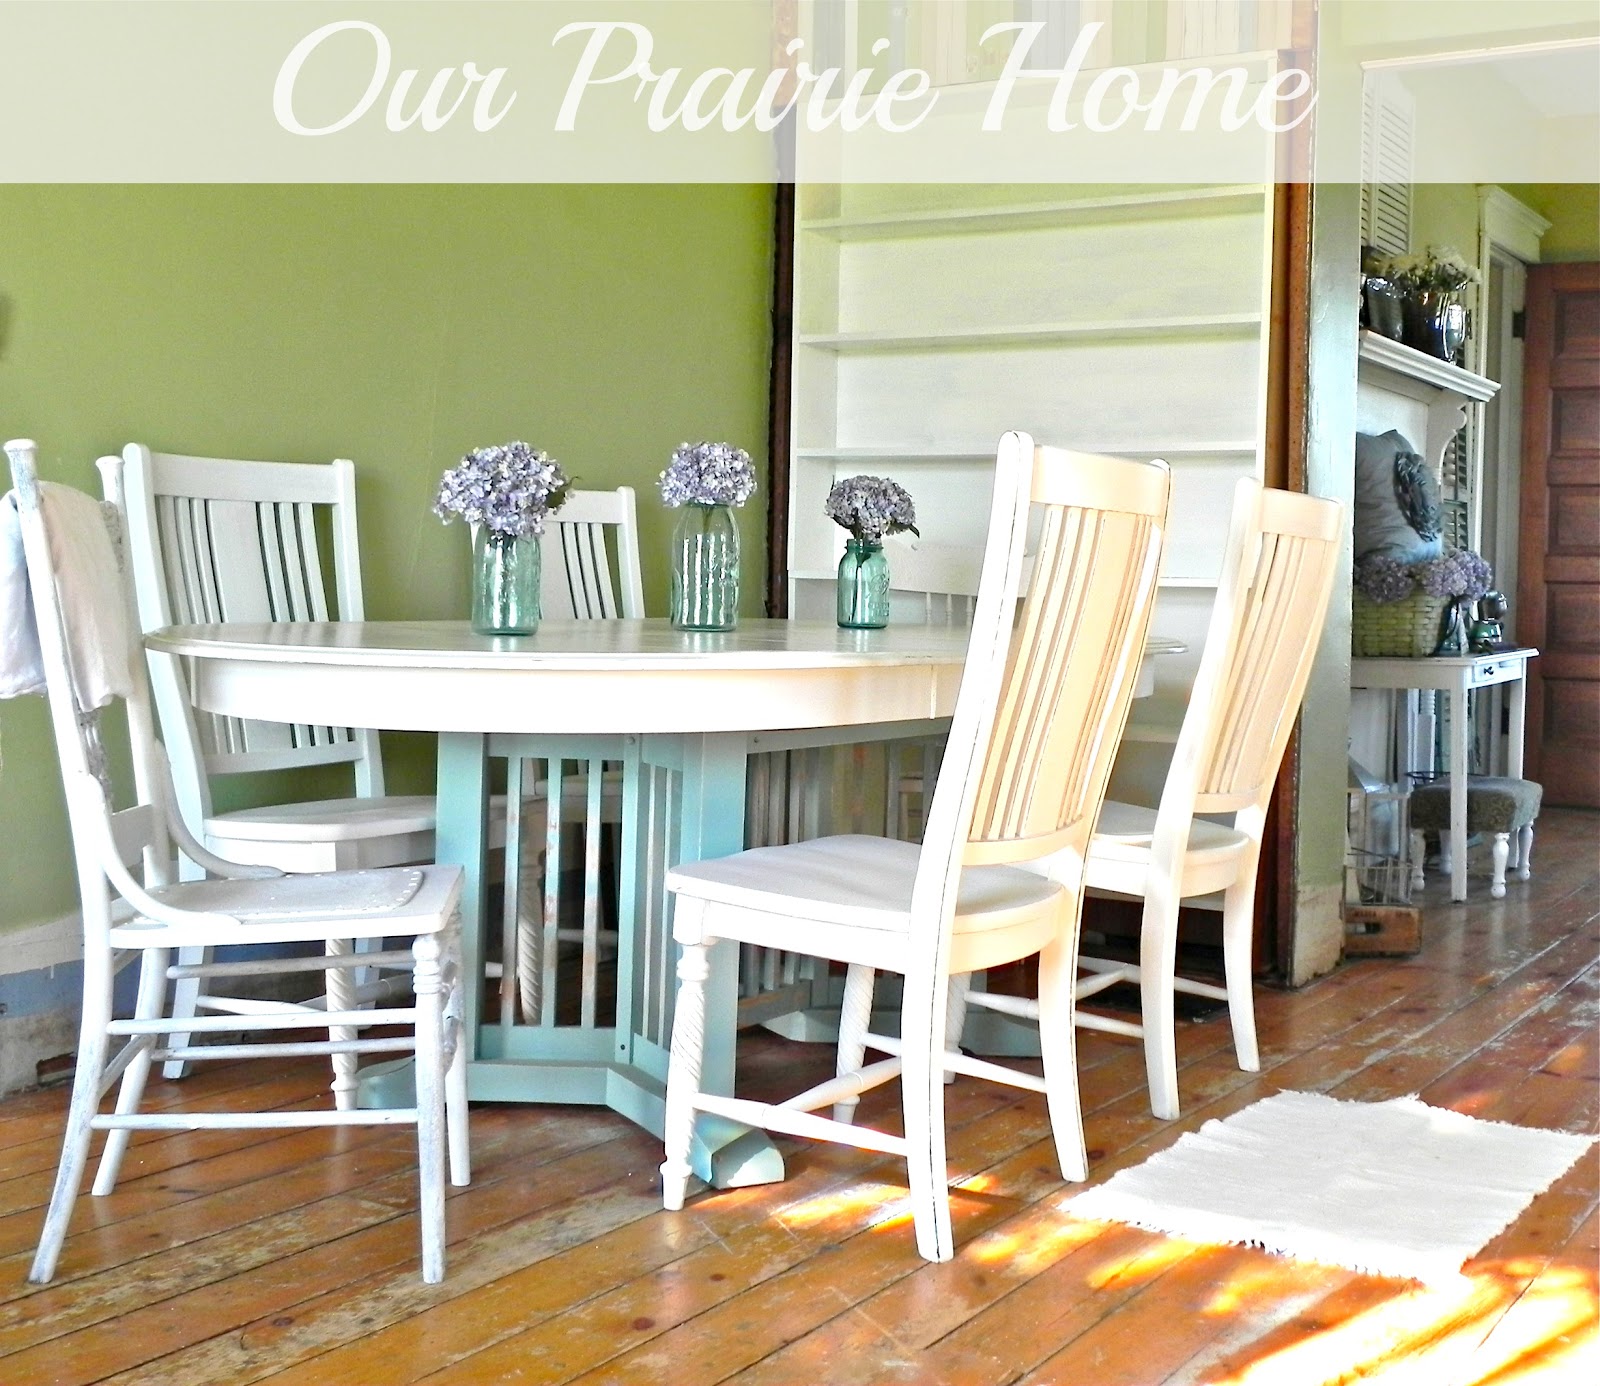
Using my trusty chalk paint recipe, I painted the top with "Cotton Balls" by Benjamin Moore and the bottom, my favorite color ever...  "Covington Blue" from the Benjamin Moore Historical Series.  Its a blue without being a blah blue.  Depending on the light, it can take on almost an aqua-y feel without being aqua.  Its a lovely color.


 I debated on going all white for quite some time, but as I usually do, I went off of what I am drawn to in my home decor magazines.  And its always the tables that the bases are painted blue.  Every.  Time.


And you know me with my "too much white" thing going on.  And of course I had to "make it look old".  ;)


And I can tell you its no fun trying to reveal a piece of furniture and get a good picture of it when the room is still in demo stage.  LOL


 So, just try to ignore the half painted book shelf with its missing trim and the destroyed wood floors that we've finally decided just to paint.  Obviously having someone come in and re-do them just ain't going to work.  The pine is just too soft to withstand our foot traffic and I'm not going to throw another $900.00 out the window for the floors in the office and the dining room again, only to have them look like they do now... Again.  Contractor horror stories, anyone?


I am still amazed at how much going lighter has made a difference in the atmosphere of our home.  Its so much more cheerful and relaxing.  

My goal is to get a bench to go on the wall side of the table, so it can be pushed back against the wall when not in use.  For now, painting the two oak pressback chairs to match works.  Plus, a bench will seat three of my rugrats, making room for everyone at the table.

I can't wait to get the wainscoting done, so I can hang that gorgeous mirror on the wall above the table.  Scott?  Are you reading this???  ;)


Next...

My Dad's rocking chair or the china hutch.  I haven't decided yet.  Check out my facebook page for new uploads of the china hutch.  We picked her up last night.  :D

XO,

Linking up to:

Friday, April 6, 2012

Pine Chimney Cabinet

Back in January when I revealed my office makeover, I told you I would tell you about the fiasco that was my pine chimney cabinet.  The best makeover stories are the screw-ups with the happy ending, I think.

A chimney cabinet or cupboard was used during the 1800's in the small narrow space in between the chimney and the wall.  Mostly used for utility storage, it was a great use of a small space.  I have no idea how old the one I found in the "Mart of Doom" (you can read while I call it that HERE) is, but it has definitely seen some wear and tear.

I managed to talk good ol' Gene down to $50.00 from his $75.00  asking price, so at least I saved a wee bit on it.


Probably still paid too much for it, but what-ev.  Serves its purpose just fine.


It was really disgustingly gross on the inside - as are most things from the "Mart of Doom", but it cleaned up really well.

Initially, my idea was to remove the lengthwise divider on the inside and replace it with horizontal shelving.  Maybe one day.  Being the midst of the massive office makeover, honestly I was just too lazy to tackle it...  Especially after my massive blunder on it.

Sooooooo...

My idea was to paint her a gorgeous blue with some homemade chalk paint and then give her a little distressing.

Did that.  Didn't like it.  Too blah.

HOLY COW.
CAN YOU BELIEVE THE OFFICE USED TO LOOK LIKE THAT?????
So, then I got the wondrous idea to write a Bible verse down the entire front of it - in paint marker.  A great idea in theory - and probably a great idea if you execute it right.  Yeah, I didn't.

Poor Scott took an hour to tediously draw lines down the entire front of the cabinet.  As I've mentioned before, I have crooked eye syndrome and I can't even draw a straight line using a ruler.  Its a terrible affliction, believe me.

When he was done, I set to work writing Proverbs 31. It looked terrible.  I tried silver paint.  It was too light.  I tried black paint over the silver paint.  It was too dark.  I had absolutely RUINED the cabinet and I was HORRIFIED.

So, I decided to see if I could take a Magic Eraser to it.  Nope, didn't work.  409?  Nope.  Clorox?  Nope.  I wanted to cry.  Seriously.  I REALLY didn't want to paint over it again.  You have to understand that at the time I was primer and painting the entire office; Walls AND trim.  Not to mention three separate furniture makeover that were going INTO said office.  I really, really didn't want to have to start over.  Considering I'm not a pro at this and I've only been making over furniture for a little over 6 months, I was at my maximum stress threshold level.

Needless to say, I DON'T have pictures of the catastrophe.  If I did, I'd show ya.

As a last ditch effort, I took the sander to it.  You know how I REALLY like my chippy, shabby look:


As I sanded, I really started to like what I was seeing.

I sanded a little more...

And a little more...

And a little more.

Bit by bit, I realized that maybe screwing it up had been a good thing.  

And the more I sanded and distressed it, the more I liked it.


Or as my kids call it, "Making Everything Old"  LOL


And even though I decided to leave the vertical divider in place, it works great for the chicken wire, newspaper, and upholstery I store in it.


Of course, Scott good naturedly grumbled about all the time he had spent drawing all the lines, so I could write the verse straight only for me to sand most of it off.  LOL  But, it works.  And goes wonderfully with the office, even if it was a mistake.  :)


Don'tcha just love it when that happens?  ;)


Happy Good Friday, y'all...

XO,


Tuesday, April 3, 2012

Reveal: Washstand

Back in November, Scott bought me this beautiful washstand from our local thrift for $125.00.  You can read about that HERE.  Although I swore I would never paint her, I did.  I gave in.  I am on a mission to purge the house of any its dark depressing-ness.  And she needed a paint job.


Yesterday, I decided to stop procrastinating and just do it already.  I fixed a few spots where her top was chipped on the edges with some wood filler and lightly sanded her down before I got to work with some homemade chalk paint...


I hemmed and hawed forever over whether to do a color or stick with white.  I usually decide to play it safe with white or some other neutral and then drool over blogger peeps that throw caution to wind and go with bright, vivid color.  Take Amy for example, from The Salvage Collection.  She's always doing awesome furniture makeovers with vibrant color, like this:

Droolin' on the "kuh-nobs".
(Ya gotta read Amy to get that.)

So, I decided to go out on a limb.  

And jump.

There's one thing about it, you're either going to love it or hate it.  I love it.  And the knobs...  Yeah.  I {heart} Hobby Lobby.  And better yet, 50% off.  I am so glad I drove 45 minutes into W'loo yesterday on a whim.  The knobs make it.


And the detailing that I love totally "pops" now.


I'm actually surprised how much I like it.  


Adore it, actually.


Super bright.  Super cheerful.

And get this...

This morning as I was groggily sitting up in bed trying to shake off the last dregs of sleep, I looked over at the rocking chair that I bought off Craigslist last summer for $30.00.  Amazingly enought, I think it was built by Square Brand too.  The detailing is almost exact.


What are the odds of that?

Pretty slim, I betcha. 


Now, some of you are probably ranting at your computer right now because I painted an antique.  You probably liked the dark heaviness of the original:


But I think she's gorgeous.


And totally me.

And when you throw in some perky spring goodness...


Does it get any better?

I don't think so.

What about you?

XO,

Thursday, January 19, 2012

Putting The Office Together: Original Desk Makeover

One of the biggest things I second guessed myself about was how to fill up the space in front of my mantle.  I poured over magazines and the internet trying to get a good idea of something that would do the trick.  Enter my old desk.

The desk I used to use for my computer was a small, dainty lady's writing table that my father stripped and refinished.  My Dad had a thing for dark stains.  All the furniture I inherited has it.  And that means a lot of work changing it into something I can live with.


This was probably one of the easiest furniture makeovers I've ever done.  Literally one and a half hours start to finish.  I sanded it a little, just because it had a heavy coat of varnish.  Daddy loved his varnish too.  LOL!  I applied two coats of homemade chalk paint, then sanded lightly with a sanding block to smooth out the finish.  Next I distressed (that caused the blister on my thumb from rubbing LOL), waxed, and added a knob from one I had bought for this purpose a few months ago.  Done.


Instant gratification.


And instead of making the interior permanent by decoupaging a piece of scrap book paper to the inside of the drawer, I just used tape on the backside, so I can change it, if/when I get tired of it.


And I just love her legs...


Although I need to buy a darker wax and apply it, so those details pop.


It never ceases to amaze me what a little paint and time can do.  :)


What a great addition to the mantle.  Love it and so easy to do!  Aren't those the best projects?  :D


Wednesday, January 18, 2012

Putting The Office Together: Dumpy Desk Makeover

Who knew when I found this little baby in the "Mart of Doom" that I would wind up liking her as much as I do.


To say she had some issues would be an understatement.  Check out the rust from the nails that were holding this on...


Gotta love the dirty stained fiberboard with quarter round to trim it out.  I found her in a darkened corner covered in junk and surrounded by tons of stuff.  I almost passed her by, but then I asked for a flash light.

After looking her over real good, even crawling on the floor to look underneath to figure out what in the heck was going on with the top, I figured the $35.00 asking price wasn't too bad.  Not great, but not bad either.

So, when I got her home, I pried off the fiberboard and trim with a spatula.  Remember that?  LOL!  You know, because I couldn't find one of my three hammers in my crap pile in the office?  LOL!  Regardless, it popped right off.  I decided to leave the base as is because I liked her age showing.  I just cleaned her up real good with some Krud Kutter.  You should have seen the filth that ran off of her.  N-A-S-T-Y!!  I must have dumped the bowl 5 or 6 times.  Then I sanded the living daylights out of the top and filled in the worst of the gouges with wood filler, while leaving some for character...


and then I sanded some more.

I primed her up but good, and then slapped a coat of chalk board white paint on the top.  Initially, I thought I'd dry brush her with my favorite paint color, but I just wasn't feeling it...


So, I re-painted it white and then glazed it with my go-to paint: Tall Cattail.  Better, but not great.

{Somehow I skipped a picture of this step.}

I thought about decoupaging the top with scrap book paper, but I didn't have enough of one kind of sheet.  Then I thought about book or hymnal pages, but I just didn't know.  So, what to do when you're at a crossroads?  Let it be.  I left her overnight, while I slept on it.  I've learned in the last 7 months that its never a good idea to force it.  You always wind up hating what you did just to say it's done.  The idea will come when its damn good and ready and not a moment before.  ;)

I was flipping through my scrapbook paper the next morning and I came across this one...


And I kept coming back to it.  Alas, I only had 2 sheets.  :(  And I really liked it.

So, what'd I do?

Cut 'em all out.  It only took about an hour.

Then I decoupaged them on at random intervals.


And then poly'd the top with two coats and decoupaged inside the drawer with scrapbook paper, as well...


I was quite satisfied.

So, this is the before...


And after...


When paired with this chair from an antique store for $35...


and the DIY chalk board for $12 that used to look like this...


and now looks like this...

The top printable you can find from the Tip Junkie.
For some reason, the link would not work.  Just search craft room printables.
The bottom printable, I just made myself in Mac iWork Pages.
Put it all together and it fits me just perfectly, just as I had hoped (like really, really hoped that I hadn't made a huge mistake when I bought it all.  LOL)...


So for $70, I had a whole new office set up.

I think the thing I have fallen in love most with in this journey of makeovers and refurnishing, is that when you refurb something, it is one of a kind.  No one else will have anything just like it.  And you can make it to suite your taste.  Plus, you're saving furniture from landfills and giving it a new lease on life.  Stuff just isn't made like it used to be and with a little money, a little work, and some effort, you can have better quality items for a fraction of the cost.  BONUS!

I know there are some thrifters that would think that I paid too much for both pieces, but you can't even think about buying a solid wood desk for that price nowadays!  Heck, you can't even buy a laminate desk for that!  ;)  And my old desk got a much needed makeover.  But, we'll save that for tomorrow.

Until then y'all...  Have an awesome day!